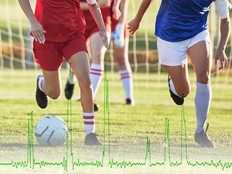
Fes un enregistrador de dades d'IA amb la micro:bit CreateAI que registra quant de temps passeu corrent, caminant i estant quiets.
Guia de projecte pas a pas
Pas 1: Entén-ho
Com funciona?
En aquest projecte, entrenareu un model de machine learning (ML) per reconèixer quan esteu corrent, caminant i estant quiets.
Combinareu aquest model amb un programa del MakeCode que utilitza la funció d'emmagatzematge de dades per gravar quina acció feu cada segon.
Aquest projecte pot ser útil en esports com ara el futbol o bàsquet on pot ser necessari analitzar com són d'actius alguns jugadors. També es pot utilitzar per monitorar quant de temps has passat corrent o caminant a les hores del pati o en un entrenament.
Què és l'aprenentatge automàtic?
L'aprenentatge automàtic (ML) és una mena d'intel·ligència artificial (IA) on els ordinadors poden aprendre i prendre decisions basades en dades.
Els humans entrenen els models de ML per ajudar-los a prendre aquestes decisions, per exemple, per reconèixer diferents "accions" quan moveu la vostra micro:bit de diferents maneres.
Què hauré de fer?
Els sistemes d'IA necessiten humans per dissenyar-los, construir-los, provar-los i utilitzar-los. Recolliràs dades per entrenar un model ML, el provaràs, el milloraràs i el combinaràs amb codi d'ordinador per fer un dispositiu intel·ligent que fa servir IA. Per fer-ho, utilitzareu una micro:bit i el lloc web micro:bit CreateAI.
Pas 2: Crea-ho
Què necessites
- Una micro:bit V2, cable USB, un porta piles amb 2 piles AAA
- Un ordinador (p.e. sobretaula, portàtil o Chromebook) amb accés a la web de micro:bit CreateAI, utilitzant els navegadors Chrome o l'Edge
- Si el teu ordinador no té Bluetooth habilitat, necessitaràs una micro:bit V2 addicional
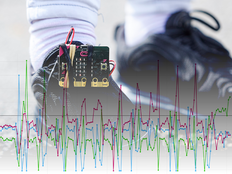
- Una corretja i un suport, o una altra manera de subjectar la micro:bit al canell (p. ex., tiges manuals flexibles o bandes elàstiques)
- You may also find our micro:bit CreateAI teaching tips useful
Recollir mostres de dades
When you open the project in micro:bit CreateAI, you’ll see we’ve given you some data samples for ‘running’, 'walking’ and ‘still’ actions:
walking
running
still
You can add your own movement samples using the micro:bit's movement sensor or accelerometer.
A micro:bit CreateAI, fes clic al botó "Connecta" per connectar la teva recollida de dades micro:bit i segueix les instruccions.
Attach the data collection micro:bit to your left wrist like a watch, with the logo at the top. Click on the first action, ‘walking’, and click 'Record' to record your own data samples. Si comets un error, pots eliminar les mostres que no vulguis. També pots prémer el botó B de la micro:bit per començar a gravar.
If you would like to record continuously for 10 seconds to get 10 samples, click on the three dots next to the record button and select that option.
Now record your own data samples for the ‘running’ action, then the ‘still’ action, making sure for ‘still’ that you collect samples in different positions, such as facing up and down.
Entrena i prova el model
Fes clic al botó "Entrena model" per entrenar el model i, a continuació, prova'l. Try walking and see if ‘walking’ is the estimated action, then running to see if ‘running’ is the estimated action. Keep still and see if ‘still’ is estimated. Give your micro:bit to someone else to wear (making sure they put it on the same wrist and in the same orientation) and see if it works as well for them.
Millora el teu model
La majoria dels models es poden millorar amb més dades. If the model needs improving, click on ‘← Edit data samples’.
You can delete any data samples which you think don’t fit or add more samples from yourself and other people.
Torna a entrenar el model i torna'l a provar.
Posa el model i el programa a la teva micro:bit
A micro:bit CreateAI, fes clic a "Edita a MakeCode" per veure el codi del projecte a l'editor MakeCode.
You can modify the code or just try it out as it is. Attach your micro:bit using a USB cable, click on the ‘Download’ button in the MakeCode screen, and follow the instructions to transfer your AI model and the code blocks to it.
Attach a battery pack to the micro:bit and put it on, ready to test out.
Collect your data
First press buttons A and B together to delete any old data logs from your micro:bit. Reset the timer by pressing the reset button on the back of the micro:bit. Press button A to start logging and button B to stop logging.
Your data will stay on your micro:bit even if you disconnect the battery or press the reset button.
Analitza les dades
Desconnecta les piles i connecta la micro:bit a l'ordinador. La micro:bit es mostra com una unitat USB amb el nom de MICROBIT. Mira a la unitat MICROBIT, obre l'arxiu MY_DATA i veuràs les teves dades en una taula al navegador web.
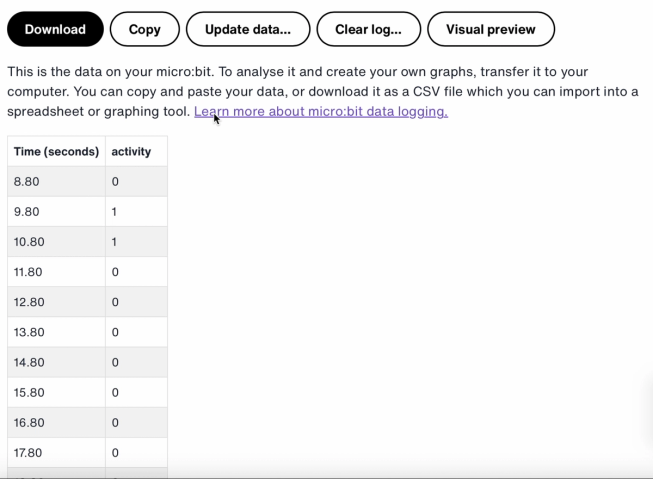
The time stamps in the log represent the amount of time that has passed since your micro:bit was powered on or reset.
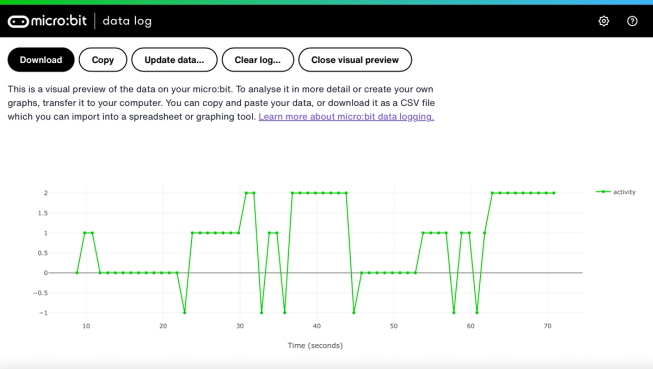
Click on Visual preview to see a graph of your data:
You can also click on the Copy button and then paste your data into a spreadsheet.
Com funcionen els blocs de codi
This program uses a variable called ‘logging’. A variable in a computer program is a container for storing data which can be accessed and updated while the program is running. In this program, the variable ‘logging’ controls if the micro:bit is logging or not and can be set to ‘true’ or ‘false’. Variables that can be set to these two values are called ‘Boolean’ variables.
When the program starts, the variable ‘logging’ is set to false. A show icon block is used to display a ‘no’ icon on the LED display to indicate the micro:bit is not logging. The set columns and set timestamp blocks create labels for the data logging table your micro:bit will produce.
The on button A pressed block is used to set logging to ‘true’ and show a ‘yes’ icon on the LED display. The on button B pressed block is used to set logging to ‘false’ and show a ‘no’ icon on the LED display. And the on buttons A + B pressed block sets logging to ‘false’, displays a skull icon, and deletes any log.
Finally, an ‘every’ block is used to check every 1,000 milliseconds or second if the micro:bit is logging. If it is, an ‘if then else’ block is used with ‘is ML detected’ and ‘log data’ blocks to record a 0 if you are still, a 1 if you are walking and a 2 if you are running in your data logging table. If the micro:bit cannot detect what you are doing, it records a -1 in the table. Bigger numbers are used for more active actions, so the resulting data logging graph gives you a clear visual record of how active you have been.
Avaluació
How accurate is the AI sports logger in tracking your movements? How could you improve its accuracy? Who would find this device particularly useful? How does it compare to the Step counter or the Movement data logger projects?
Pas 3: Estén-lo
- Add a fourth action such as ‘throwing’ for sports like netball or tennis.
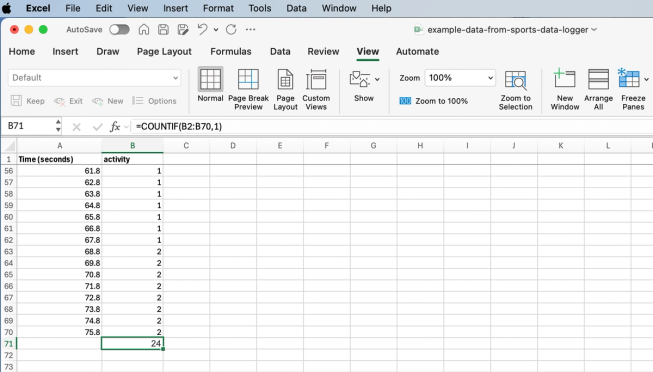
Excel spreadsheet with formula to count certain activity cells
- Add up how much time you spent on each activity. You could do this saving your data as a CSV file, opening it in a spreadsheet and using a formula such as =COUNTIF(B2:B70,1) Where B2:B70 is the range of the activity cells, and 1 is the activity number meaning ‘walking’.
També et pot agradar
Crea un temporitzador d'exercici intel·ligent amb IA
Utilitza la ciència de dades per millorar les teves habilitats esportives
Feu servir el data logging per fer un comptador de passes millorat.
This content is published under a Creative Commons Attribution-ShareAlike 4.0 International (CC BY-SA 4.0) licence.