Crie um registrador de dados esportivos com IA usando o micro:bit CreateAI, que registra quanto tempo você e outras pessoas passam correndo, caminhando e parados.
Guia passo a passo do projeto
Passo 1: Entender
Como funciona?
Neste projeto, você treinará um modelo de aprendizado de máquina (ML) para reconhecer quando você está correndo, caminhando e parado.
Você combinará esse modelo com um programa MakeCode que usa a função de registro de dados do micro:bit para registrar qual ação você está realizando a cada segundo.
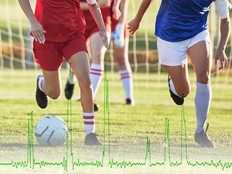
Este projeto pode ser útil em esportes como futebol ou netball, onde é necessário analisar o nível de atividade de determinados jogadores. Também pode ser usado para monitorar quanto tempo você passou correndo ou caminhando durante as férias escolares ou durante um treino.
O que é aprendizado de máquina?
Aprendizado de máquina (ML ou Machine Learning) é um tipo de inteligência artificial (IA) onde os computadores podem aprender e tomar decisões com base em dados.
Os modelos de ML são treinados por humanos para ajudá-los a tomar essas decisões, por exemplo, reconhecer diferentes 'ações' quando você move seu micro:bit de maneiras diferentes.
O que eu precisarei fazer?
Os sistemas de IA precisam de humanos para projetá-los, construí-los, testá-los e usá-los. Você vai coletar dados para treinar um modelo de ML, testá-lo, aprimorá-lo e combiná-lo com código de computador para criar um dispositivo inteligente que utiliza IA. Você usará um micro:bit e o site micro:bit CreateAI para fazer isso.
Passo 2: Criação
Itens necessários:
- Um micro:bit V2, um cabo USB e um conjunto de baterias com 2 pilhas AAA.
- Um computador (por exemplo, desktop, notebook ou Chromebook) com acesso ao site do micro:bit CreateAI, usando um navegador Chrome ou Edge
- Caso o seu computador não tenha Bluetooth ativado, você precisará de mais um micro:bit V2
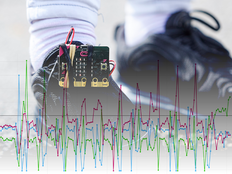
- Uma pulseira e suporte, ou outra forma de prender o micro:bit ao seu pulso (por exemplo, hastes flexíveis de artesanato ou elásticos)
- Você também pode achar úteis as nossas dicas de ensino do CreateAI para o micro:bit
Colete amostras de dados
Ao abrir o projeto no micro:bit CreateAI, você verá que incluímos alguns exemplos de dados para as ações de "correr", "andar" e "parado":
walking
running
still
Você pode adicionar suas próprias amostras de movimento usando o sensor de movimento ou o acelerômetro do micro:bit.
No micro:bit CreateAI, clique no botão 'Conectar' para conectar seu micro:bit de coleta de dados e siga as instruções.
Prenda o micro:bit de coleta de dados ao seu pulso esquerdo como se fosse um relógio, com o logotipo na parte superior. Clique na primeira ação, "caminhar", e clique em "Gravar" para registrar suas próprias amostras de dados. Caso cometa um erro, você pode excluir as amostras que não desejar. Também é possível pressionar o botão B no micro:bit para começar a gravar.
Se você quiser gravar continuamente por 10 segundos para obter 10 amostras, clique nos três pontos ao lado do botão de registro e selecione essa opção.
Agora, registre suas próprias amostras de dados para a ação de "correr" e, em seguida, para a ação de "parado", certificando-se de coletar amostras em diferentes posições para a ação de "parado". Por exemplo, olhando para cima e olhando para baixo.
Treine e teste o modelo
Clique no botão "Treinar modelo" para treinar o modelo e, em seguida, teste-o. Experimente caminhar e veja se a ação de "caminhar" é estimada, depois corra para verificar se a ação "correr" é estimada. Fique parado e veja se a condição de "parado" é estimada. Empreste seu micro:bit para outra pessoa usar (certificando-se de que ela o coloque no mesmo pulso e na mesma orientação) e veja se funciona tão bem para ela.
Aprimore seu modelo
A maioria dos modelos pode ser aprimorada com mais dados. Se o modelo precisar de melhorias, clique em ‘← Editar amostras de dados’.
Você pode excluir quaisquer amostras de dados que considere inadequadas, ou adicionar mais amostras suas e de outras pessoas.
Treine o modelo novamente e teste-o de novo.
Coloque o modelo e o código no seu micro:bit
No micro:bit CreateAI, clique em ‘Editar no MakeCode’ para ver o código do projeto no editor MakeCode.
Você pode modificar o programa ou simplesmente testá-lo como está. Conecte seu micro:bit usando um cabo USB, clique no botão "Download" na tela do MakeCode e siga as instruções para transferir seu modelo de IA e os blocos de código para ele.
Conecte um conjunto de baterias ao micro:bit e coloque-a, pronta para testar.
Coleta de seus dados
Primeiro pressione os botões A E B juntos para excluir quaisquer registros de dados antigos do seu micro:bit. Reinicie o temporizador pressionando o botão de reinicialização na parte traseira do micro:bit. Pressione o botão A para iniciar o registro e o botão B para parar o registro.
Seus dados permanecerão no seu micro:bit mesmo se você remover a pilha ou pressionar o botão de reinicialização.
Analise seus dados
Desconecte o pack de pilhas e conecte o micro:bit novamente ao computador. O micro:bit aparece como uma unidade USB chamada MICROBIT. Procure o drive MICROBIT e abra o arquivo MY_DATA para visualizar uma tabela com seus dados em um navegador da web:
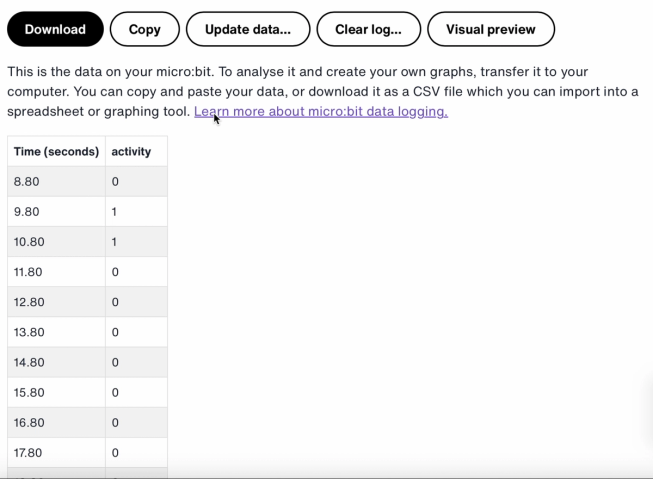
Os registros de data e hora representam o tempo decorrido desde que seu micro:bit foi ligado ou reiniciado.
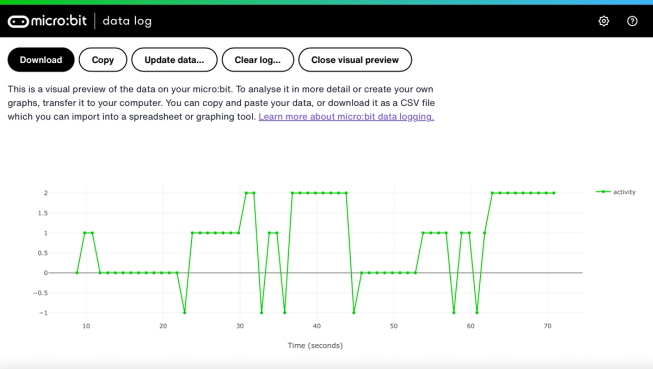
Clique em "Visualização" para ver um gráfico dos seus dados:
Você também pode clicar no botão "Copiar" e depois colar seus dados em uma planilha.
Como funcionam os blocos de código
Este programa utiliza uma variável chamada "logging". Uma variável em um programa de computador é um contêiner usado para armazenar dados que podem ser acessados e atualizados enquanto o programa está em execução. Neste programa, a variável “logging” controla se o micro:bit está registrando dados ou não e pode ser definida como “verdadeiro” ou “falso”. Variáveis que podem ser definidas com esses dois valores são chamadas de variáveis “booleanas”.
Quando o programa é iniciado, a variável "logging" é definida como falso. Um bloco “mostrar ícone” é usado para exibir um ícone de “não” na matriz de LEDs, indicando que o micro:bit não está registrando dados. Os blocos “definir colunas” e “definir carimbo de data/hora” criam rótulos para a tabela de registro de dados que será gerada pelo seu micro:bit.
O bloco “ao pressionar o botão A” é usado para definir a variável logging como “verdadeiro” e mostrar um ícone de “sim” na matriz de LEDs. O bloco “ao pressionar o botão B” é usado para definir a variável logging como “falso” e mostrar um ícone de “não” na matriz de LEDs. E o bloco “ao pressionar os botões A + B” define a variável logging como “falso”, exibe um ícone de caveira e apaga qualquer registro.
Por fim, um bloco “a cada” é usado para verificar, a cada 1.000 milissegundos (ou segundo), se o micro:bit está registrando dados. Se estiver, um bloco “se então senão” é usado com os blocos “ML detectado” e “registrar dados” para registrar um 0 se você estiver parado, um 1 se estiver caminhando e um 2 se estiver correndo na sua tabela de registro de dados. Se o micro:bit não conseguir detectar o que você está fazendo, ele registra um -1 na tabela de registro de dados. Números maiores são usados para ações mais ativas, de modo que o gráfico do registro de dados resultante fornece um registro visual claro do seu nível de atividade.
Avaliação
Qual é a precisão do registrador de dados esportivos com IA em acompanhar seus movimentos? Como você poderia melhorar sua precisão? Quem acharia este dispositivo particularmente útil? Como ele se compara aos projetos de Contador de passos ou Registrador de dados de movimento?
Passo 3: Melhorias
- Adicione uma quarta ação, como “arremessar”, para esportes como netball ou tênis.
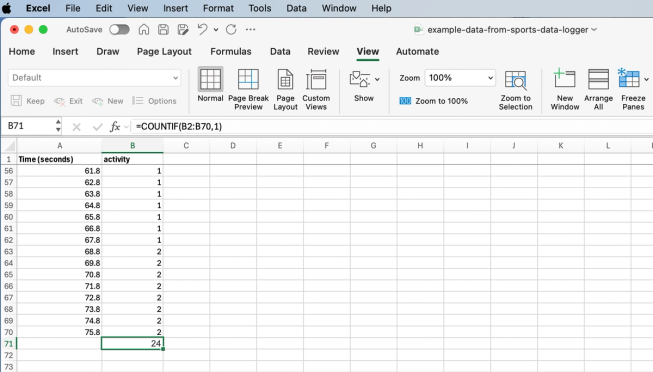
Planilha do Excel com fórmula para contar células de uma determinada atividade.
- Some quanto tempo você gastou em cada atividade. Você pode fazer isso salvando seus dados como um arquivo CSV, abrindo-o em uma planilha e usando uma fórmula como =COUNTIF(B2:B70;1) onde B2:B70 é o intervalo das células da atividade, e 1 é o número da atividade, que significa “caminhada”
Você pode gostar de
Crie um temporizador de exercícios inteligente usando IA
Use a ciência de dados para melhorar suas habilidades esportivas.
Use o registro de dados para criar um contador de passos melhor.
This content is published under a Creative Commons Attribution-ShareAlike 4.0 International (CC BY-SA 4.0) licence.