Step 1: Make it
What is it?
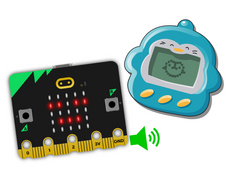
Start discovering some of the things the BBC micro:bit can do with this interactive investigation.
These two videos show you what it does and how to code it:
Introduction
Coding guide
How it works
You can use this project as an introductory exploration activity for anyone new to the micro:bit.
Copy the code on to some micro:bits, and start investigating what it does. What events make the micro:bit respond? What inputs and outputs is it using? What programming concepts might be making it work?
Then examine the code to see how instructions in code blocks tell the micro:bit what to do:
- Instructions in the ‘on start’ block run once only, when the micro:bit is reset or is powered on. The 'show icon' block shows a happy face on the LED display output.
- Events make different things happen when you press different input buttons. The 'on button A pressed' block is triggered when you press button A. Your micro:bit then shows a square zooming in quickly, then zooming out more slowly.
- The animation is made by showing different images in a sequence. Pausing for shorter and longer times controls the speed of the animation.
- Pressing button B shows how the micro:bit can scroll text on the LED display output using the 'show string' block. 'Strings' are what we call collections of letters and symbols stored in a computer.
- Press button A and B together to reveal a puzzle. You'll either see a sun or a moon. Can you work out what determines which picture is shown?
- It depends how much light is falling on your micro:bit. The micro:bit's LED output can also work as an input, a light sensor.
- The code uses an 'if... then... else' statement. This is known as selection, or a conditional statement. It tests if the light level is below 50. If it is, then it shows a moon. Otherwise, else, it shows a sun.
- The 'on shake' block reacts to information from the micro:bit's accelerometer sensor input. When you shake your micro:bit, it shows a surprised face for one second.
- If you have a micro:bit V2 or connect headphones or a speaker to your micro:bit, you'll also hear different sounds when each different input event happens.
What you need
- At least one micro:bit for every 2-3 people
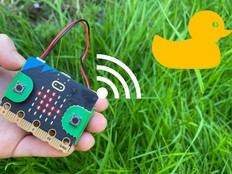
- Battery packs (optional)
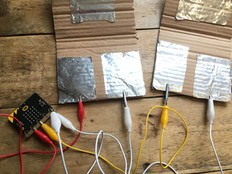
- Headphones and crocodile clip leads to hear sound on micro:bit V1 (optional)
- Meet your micro:bit worksheet (optional)
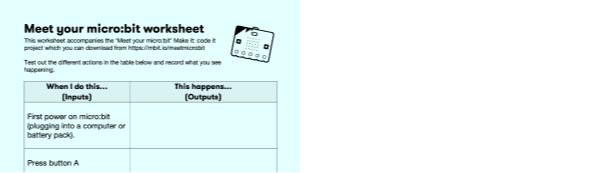
Meet your micro:bit worksheet
You may also find our Transfer to the micro:bit guide useful to learn more about how to transfer code from the editor to a micro:bit.
Step 2: Code it
1# Imports go at the top
2from microbit import *
3import music
4
5
6display.show(Image.HAPPY)
7
8while True:
9    sleep(300)
10    if button_a.is_pressed() and button_b.is_pressed():
11        if display.read_light_level() < 50:
12            music.play(music.POWER_DOWN, wait=False)
13            display.show(Image('00990:'
14                               '00099:'
15                               '00099:'
16                               '00099:'
17                               '00990'))
18        else:
19            music.play(music.POWER_UP, wait=False)
20            display.show(Image('90909:'
21                               '09990:'
22                               '99999:'
23                               '09990:'
24                               '90909'))
25    elif button_b.is_pressed():
26        music.play(music.BA_DING, wait=False)
27        display.clear()
28        sleep(100)
29        display.scroll('Hello!')
30    elif button_a.is_pressed():
31        music.play(music.PRELUDE, wait=False)
32        for i in range(2):
33            display.show(Image('00000:'
34                               '00000:'
35                               '00900:'
36                               '00000:'
37                               '00000'))
38            sleep(100)
39            display.show(Image('00000:'
40                               '09990:'
41                               '09990:'
42                               '09990:'
43                               '00000'))
44            sleep(100)
45            display.show(Image('99999:'
46                               '99999:'
47                               '99999:'
48                               '99999:'
49                               '99999'))
50            sleep(1000)
51            display.show(Image('00000:'
52                               '09990:'
53                               '09990:'
54                               '09990:'
55                               '00000'))
56            sleep(1000)
57            display.show(Image('00000:'
58                               '00000:'
59                               '00900:'
60                               '00000:'
61                               '00000'))
62            sleep(1000)
63    elif accelerometer.is_gesture('shake'):
64        music.play(music.JUMP_UP, wait=False)
65        display.show(Image.SURPRISED)
66
67Step 3: Improve it
- Modify the code to make your own 'Meet your micro:bit' project with different pictures, animations and sounds.
- Add extra inputs: can you make your micro:bit react to gestures other than 'shake'? React to pressing pins? Or, if you have the micro:bit V2 with built-in speaker, react to loud sounds or touching the logo?