Primeiro passo: o projeto
O que é?
Use dois BBC micro:bits para medir níveis sonoros em uma investigação científica sobre as propriedades de isolamento sonoro de diferentes materiais.
Introdução
Código
Neste projeto, você usará a tecnologia de computação para transformar micro:bits em ferramentas para ajudá-lo a realizar um experimento científico.
Ele usa dois micro:bits e uma fonte de som para testar o isolamento sonoro de diferentes materiais. Então você pode ler as medidas de nível sonoro mesmo quando o sensor está coberto, ele transmite medições sonoras por rádio para um receptor micro:bit colocado nas proximidades.
Você pode transferir o código diferente (abaixo) para o transmissor e o receptor micro:bits, ou você pode programar você mesmo e aprender como ele funciona no vídeo de codificação acima.
Transmissor / sensor
O transmissor micro:bit, que deve ser um micro:bit V2, é um sensor de som que você vai usará em diferentes materiais. Usa seu microfone para medir os níveis de som e depois os envia por rádio.
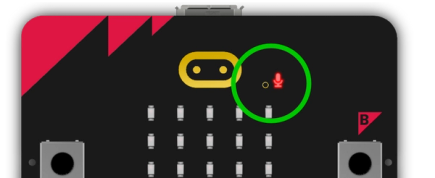
O microfone detecta o som de um pequeno buraco na parte da frente do micro:bit. Certifique-se de que os materiais que você deseja testar não estejam tocando ou se movendo contra isso, pois isso pode afetar suas medições de nível de som. Pode ser útil colocar o micro:bit sensor dentro de uma caixa de papelão revestida com diferentes materiais, por exemplo.
Fonte de som
Coloque uma fonte de som a uma distância fixa do sensor. Isso pode ser qualquer coisa, como um instrumento musical que faça um som com volume consistente, ou um toque de telefone celular. Também fornecemos um arquivo de áudio abaixo que pode ser reproduzido em um telefone ou computador.
O fato de a fonte sonora emitir sons com o mesmo volume e a mesma distância do sensor garante um teste justo.
Receptor
O receptor micro:bit é onde você visualiza as leituras de nível de som. Você pode colocá-lo em qualquer lugar a poucos metros do transmissor.
Iniciando o experimento/Iniciando o teste
- Envolva o transmissor/sensor no material que você deseja testar.
- Pressione o botão de reinicialização na parte traseira do receptor micro:bit ao iniciar cada teste para definir o nível de som de volta para 0. Fique bem quieto!
- Emita um som usando sua fonte sonora.
- Pressione o botão A no receptor para visualizar o nível de som no visor de LED. Isso é mostrado em uma escala de 0 (o mais silencioso) a 255 (o mais alto). Ele mostra o nível máximo de som medido desde quando que você pressionou o botão de reinicialização.
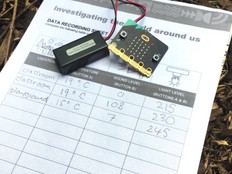
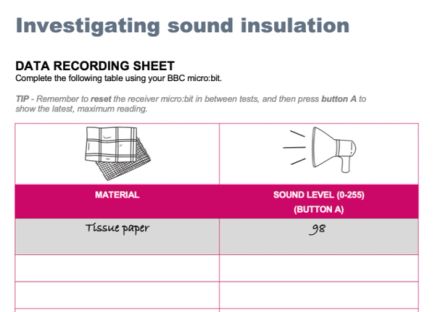
- Anote o número usando nosso armazenamento registro de dados ou em outra folha de papel.
- Repita o experimento, envolvendo o transmissor/sensor em materiais diferentes.
- Em seguida, você pode analisar seus dados para tirar conclusões sobre quais materiais são os melhores isolantes sonoros.
Itens necessários:
- Dois micro:bits. (O transmissor deve ser um micro:bit V2, mas o receptor pode ser um micro:bit V1 ou V2).
- Pelo menos um conjunto de baterias (recomendado para o transmissor)
- Uma fonte de som constante
- Diferentes materiais para testar, por exemplo, espuma, plástico bolha, papelão e papel. Uma pequena caixa de papelão também pode ser útil
- Fita adesiva ou elásticos para manter os materiais no lugar
- Uma régua ou fita métrica para medir uma distância fixa entre a fonte sonora e o transmissor
- Planilha de registros de dados ou papel e lápis
Recursos de suporte
A planilha de registro de dados pode ser usada para registrar suas medições, e o arquivo de som pode ser reproduzido em um telefone ou computador para ser usado como fonte de som.
Segundo passo: é hora de programar
Transmissor / sensor
Receptor
Múltiplos experimentos na mesma sala
Se você precisar realizar vários experimentos na mesma sala, cada par de micro:bits precisará de seu próprio número de grupo de rádio exclusivo. Modifique o código para alterar o número do grupo de rádio. Você pode usar qualquer número de grupo de rádio entre 0 e 255, certificando-se de que os números em cada par de micro:bits sejam iguais.
This content is published under a Creative Commons Attribution-ShareAlike 4.0 International (CC BY-SA 4.0) licence.
