步驟1:製作
這是什麼?
Play different tunes by using the micro:bit’s touch sensor.
這兩個影片向您展示了製作內容和編碼方式:
介紹
編程指引
運作方式
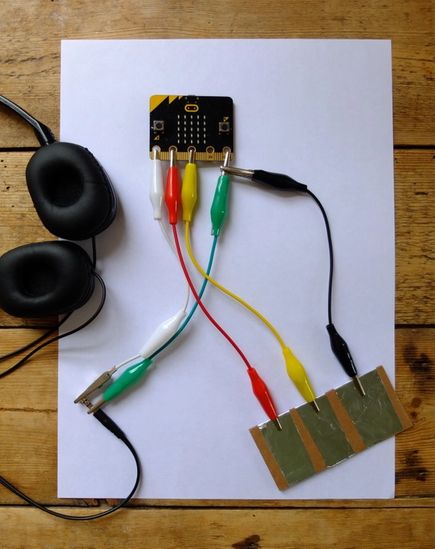
- This project is the same as the Jukebox project but instead of using the micro:bit’s buttons, you’ll make your own input device using cardboard covered in strips of tin foil connected by crocodile clip leads to the micro:bit's pins.
- Flash the program onto your micro:bit.
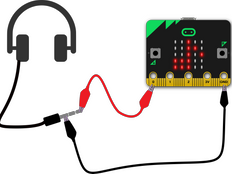
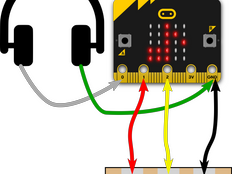
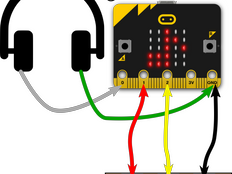
- Attach one end of three crocodile clip leads to pins 1, 2 and GND (ground or Earth pin). Attach the other ends to a cardboard guitar or keyboard.
- With one finger touch the foil connected to GND, and with another finger touch the foil connected to pin 1 and then pin 2. It should play a different tune depending on which strip of foil you touch.
- The micro:bit is using pins 1 and 2 as touch inputs. When you touch either of these pins and the GND pin, you’re completing an electrical circuit. A small amount of electricity flows through you, the micro:bit can detect it and the program triggers the playing of a tune.
- If you do not have a V2 micro:bit, which plays sound, attach headphones to pins 0 and GND.
你需要的東西
- micro:bit和選配電池组
- MakeCode 或, Python 編輯器
- three crocodile clip leads
- cardboard, tin foil, glue stick and scissors to make a guitar or keyboard
- optional headphones, buzzer, or speaker with additional two crocodile clip leads for V1 users
步驟2:編碼
步驟3:進階
- Change the tunes that are played when you touch the tin foil.
- 編寫自己的音樂。
- Show different pictures, letters, numbers, or words depending on which tune you picked.